Pages

Wednesday, July 31, 2013

Useful tips for FTP

In my last post where I had discussed about image catalog using FTP of the ISO image. However, I did not discuss FTP in detail. Now, lets see some useful facts about FTP.

FTP can be done in two way GET and PUT :-

We can achieve the same result using both PUT and GET command. It is a two way process between the i-Series and the PC. Lets discuss with a example,

We want to transfer file abc.doc to iSeries system name Kelly. The file is at
C:\Documents and Settings\Sharmistha\My Documents

I want to transfer the document abc.doc to iSeries library QGPL

When I do it from my PC the command would be,

Go to command prompt

C:\Documents and Settings\Sharmistha\My Documents

Start FTP from this location to your iSeries system,

C:\Documents and Settings\Sharmistha\My Documents\ ftp kelly(ip address)

this will ask for login id and password. After you enter the system, do the following.

ftp> quote site namefmt 1 ( this is done for objects are defined in OS400  IFS format)

ftp> bin ( object transferred in binary form)

ftp> PUT abc.doc  /qsys.lib/qgpl.lib/abc.doc

This will transfer from PC to iSeries. Now, we can do the same using GET command,


:\Documents and Settings\Sharmistha\My Documents

Start FTP from this location to your iSeries system,

C:\Documents and Settings\Sharmistha\My Documents\ ftp kelly(ip address)

this will ask for login id and password. After you enter the system, do the following.

ftp> quote site namefmt 1 ( this is done for objects are defined in OS400  IFS format)

ftp> bin ( object transferred in binary form)

ftp> GET /qsys.lib/qgpl.lib/abc.doc abc.doc


Save files (SAVF) are great for transferring iSeries and AS/400 objects between OS/400-based machines. Whether it's a group PTF, a file, a library or even a licensed program, save files can quickly zip large amounts of information between two AS/400s, especially if the save files are transmitted via FTP.

Few things to keep in mind when using FTP:-

1- BINARY :- Binary transfers mean that OS/400 FTP will create an exact mirror image of your save file on your target machine. The file is transferred bit-by-bit, and it is reassembled on the receiving machine exactly as it looks on the sending machine, with no EBCDIC translation performed. Incidentally, this also helps speed up your FTP transfer.

2- NAMEFMT :- This is used to specify how the objects in OS400 are defined. NAMEFMT 1 is for IFS format and NAMEFMT 0 is for library/object format. When you use NAMEFMT 0 , the save file must be previously created in target AS400, to enable the transfer of  save file between systems. If this save file is not created, mostly the system would create a new physical file and store the save file in it which is not what you want. So, it is advisable to create save file in target system before FTP'ing.

When using NAMEFMT 1, in which Integrated file system nomenclature is used, the system automatically creates the save file, when you have used IFS naming convention and also you have mentioned .savf file extension.

Example,

PUT /qsys.lib/ssahoo.lib/abc.savf  /qsys.lib/target.lib/abc.savf

3- Empty target save file for correct FTP :-  If you have created the target save file newly or if it is empty then the FTP completes successfully. You can use CRTSAVF command to create save file in target system or use CLRSAVF command to clear the existing save file in target system.

4- Using RCMD from command prompt :- You can also use RCMD command from PC command prompt to execute AS400 command in the iseries system.

Example,

QUOTE RCMD CRTSAVF FILE(SSAHOO/ABC) TEXT('SAVE FILE FOR TARGET MACHINE)


Friday, July 26, 2013

Finding information of last Full system save

For Auditing and for disaster recovery it is useful, to have information of the last Full system save. Usually, across the industry, it is a best practice to store the Backup information. Generally, the tape used for the backup and the backup type and whether it was a successful backup or not is recommended to be kept stored. Some, firms have soft copies of these information and some hard copy of the  information stored.

By keeping these information, it makes things easier at the time of disaster. Lets now look at the native SAVE operations that is available with OS400. IBM provides many useful data area that save the important information of the last Full system save.

* QSAVSYS :- This data area saves information of the last SAVSYS command run.

* QSAVCFG :- This data area saves information of the last save on Configuration objects and the system resource objects.

*QSAVUSRPRF :- This data area saves information of the last save of all user profile in the system

*QSAVIBM :- This data area saves information of the last save on  IBM libraries or system libraries that starts with Q.

*QSAVALLUSR :- The data area saves information of all the last SAVLIB with *ALLUSR was run. It saves information of User libraries and also the Q libraries that are not considered system libraries such as QGPL, QPFR etc.

*QSAVLIBALL :- This data area saves information of the last SAVLIB with *NONSYS was run, which saves all the user libraries, QGPL and QUSRSYS.

*QSAVSTG :- This data area saves information of the last SAVSTG was run, this stores information of License internal code and content of auxiliary storage.

However, if you try to read the information on these data areas by the normal DSPDTAARA it would appear blank.

You can get the list of QSAV data areas by the following command,

WRKOBJ OBJ(QSYS/QSAV*) OBJTYPE(*DTAARA)


To get information about the last save system,

DSPOBJD OBJ(QSYS/QSAVSYS) OBJTYPE(*DTAARA) DETAIL(*FULL)
 Page down to the bottom,


Here, you can get the date and time when the last full system save was taken. The Tape used and the command that was run. 

Thursday, July 18, 2013

Option 21 Full system Save

The OS400 provides SAVE menu to take backup. As we have already seen in previous post, this menu helps in taking specific backups like libraries or objects. To take a Full system Save using this IBM native menu, the option is OPTION 21, for Full System Save. Therefore, it is often known as OPTION 21 Backup.

Now, lets explore this in detail,

From command line enter command GO SAVE.


Page Down to option 21 Entire System.

Take Option 21, now the below screen appears.

Enter to continue.
Specify the device name and other options as per the requirement. Page down .


Wednesday, July 17, 2013

Introduction to Backup

Overview

As with all computer systems, your work on the i5 should be backed up periodically so that you can recover lost data.

Losing data is disastrous if you don't have a backup of everything you could possibly lose.

Initializing

You need to prepare the tape or diskette before you back up anything to tape or diskette. This process is called initialization.

Initializing Tapes
INZTAP

F4


Backing Up
Backing up is a very important part of daily operations. The i5/OS has a different save command for each type of saving operation. 

Always remember to:

You have enough initialized tapes.
Give *SAVSYS special authority to those users who need to perform any kind of save or restore operation.

Saving Libraries 
SAVLIB LIB(XYZ) DEV(TAP01) 

Saving Objects
SAVOBJ OBJ(ABC) LIB(XYZ) DEV(TAP01) OBJTYPE(*FILE) OUTPUT(*PRINT)


Below, screen describes the various commands under GO SAVE menu, these can be individually used to save specific objects in OS400.


Using Save Files
To use a save file instead of tape, you must create the save file first.

CRTSAVF FILE(MYLIB/MYSAVF) TEXT('Save file for backups') 

To save to the save file, execute the usual save command, except specify DEV(*SAVF) and the name of the save file in the SAVF parameter.

SAVLIB LIB(ACCTG) DEV(*SAVF) SAVF(MYLIB/MYSAVF) 

This command saves the entire ACCTG library in save file MYSAVF in library MYLIB.

Entire System Backup

Step 1 : Hold All Job Schedule Programs

Step 2 : ENDSBS *ALL ( *IMMED)

Step 3 : WRKSBS ( Display Active Subsystem ) 
Check if all subsystem have ended .

Step 4 : WRKACTJOB ( Display Active Job )
Check if any job is active .
Step 5 : GO SAVE ( F4 ) ( For Backup )


Take Option 21 for Full system save.


Checking Cache Battery information using SST

Hi,

Just wanted to expand the same topic about finding the Cache battery using the Service tools application. For this you need to use an id that has authority to run service tool and also you need have the service tools id and password. In general, these passwords are protected and is provided on valid request. This passwords are kept in a database that cannot be accessed by the Admin team. It is provided to admin team on demand and is kept protected. This enables Industry to keep check on how these are used and when, so that there is no misuse.

To start the Service tools application use command :- STRSST

It will ask to provide the SST user id and password, once you are inside this the screen looks as below,


Take option 1 to start, after this the following screen appears and take option 4 there.

Then take option 1

Take Option 2 in below screen,

In the LIC screen take page down,

Check for advance analysis, take option 14,


Check for Battery info and select that in Advance analysis screen,

Now, this will provide you full information of all the cache battery.


Page down to check more information.


Here, you can clearly identify in above example the DC01 battery needs to be replaced immediately as the Est. time to warning and Est. time to error are zero.


Monday, July 15, 2013

Implementing BACKUP in AS400 using native AS400 OS backup system

Now a days, BRMS (Backup Recovery Media Services) is more widely used and recommended software that is being used for backup management. However, I am going to first describe the Native Backup management system that AS400 OS provides and how this can be configured and managed to take up backup successfully for Daily, Weekly, Monthly etc. Lets now describe the feature and how to setup backup using this,

The AS/400 backup program is native to the AS/400 operating system.  It can be accessed from a command line by typing go backup.  Follow the procedures below to implement a backup job.

Daily Backup

·         Option 10 to Set a backup
·         Option 1 to Change daily backup options
·         TAP01 for Backup device
·         *ANY for Tape sets to rotate
·         Y to Erase tape before backup
·         1 (selected from list) for User libraries
·         3 (none) for Folders
·         3 (none) for User directories
·         N for Security data
·         N for Configuration
·         N for Save changed objects only
·         Y for Submit backup as batch job
·         Y for Print detailed report

Press enter will schedule the job on the job scheduler. 

Weekly Backup

·         Option 10 to Set a backup
·         Option 2 to Change weekly backup options
·         TAP01 for Backup device
·         *ANY for Tape sets to rotate
·         Y to Erase tape before backup
·         1 (selected from list) for User libraries
·         3 (none) for Folders
·         3 (none) for User directories
·         Y for Security data
·         Y for Configuration
·         N for Save changed objects only
·         Y for Submit backup as batch job
·         Y for Print detailed report

Press enter will schedule the job on the job scheduler. 

Monthly Backup

These options are not used.

Quarterly Backup

·         Enter go save from a command line
·         Option 21 for Entire system
·         Use defaults except for N for Active files and *NOTIFY for Message queue delivery
·         Use defaults to end subsystems
·         Use defaults for save system, save library, save document library, and save object

Backup Libraries

·         Option 10 to Set a backup
·         Option 10 to Change library backup list
·         Option 2 to select libraries to back up and then select option 1 (daily, weekly, monthly), option 2 (weekly and monthly), option 3 (weekly and monthly), or option 4 (no backup)

Backup Folders

Folders are not backed up on the AS/400 except for quarterly backups.

Backup Schedule

·         Option 20 to Change backup schedule
·         Y to Run backups using this schedule
·         Enter type of backup and time with appropriate day
·         Leave blank Occurrence of day in month to run monthly backup
·         *NOMSG for Hours before backup to send load tape message

Press enter to schedule the backup jobs according to this schedule.

Backup Job Names

From a command line, enter wrkjobscde to access the job scheduler. You can use this to schedule the backups, the job names for the same are as below.
·         QEZBKTMMON
·         QEZBKTMTUE
·         QEZBKTMWED
·         QEZBKTMTHU
·         QEZBKTMFRI
·         QEZBKTMSAT

·         QEZBKTMSUN

Cache Battery Information

The Cache battery plays a significant role to provide power to the hard disk. When one of these batteries dies, it affects the array of disk that it controls and will have a significant impact on the hard disk performance. The Cache battery or lithium ion batteries can be hot swapped, means  they can be changed when the system is up and running. However, sometimes depending on the machine type it would require to bring down the system to change the battery.

The battery sends warning messages to QSYSOPR message queue before 90 days of its expiry.

CPPEA13 - *Attention* Contact your hardware service provider
CPP8988 - A critical system hardware problem has occurred. Critical Message Handler has been run.

Once, you confirm that this is a battery that is about to expire from work with problem (WRKPRB) or via STRSST or by QSMBTTCC program.

Through QSMBTTCC program:-

CALL PGM(QSYS/QSMBTTCC)  


As you can see here the Estimated time to warning and Estimated time to error , you can determine how many days are left to change the battery. Then you have to call up IBM and inform them your battery resource name , serial number that needs to change. IBM will deliver the new battery and will the CE(customer engineer) will replace this. In order to avoid any critical situation , it is wise to record the battery information once a week or month for all the system that you manage. 

You can also pull the same information by using STRSST profile.
STRSST :- 

After you sign in to SST, you can check the status of all cache batteries on your machine by selecting option 1 (Start a Service Tool) followed by option 7 (Hardware Service Manager), and option 9 (Work with resources containing cache battery packs). The Work with resources containing battery packs screen displays all the resources that contain a battery pack. If you take an option 5 (Display battery information) for any of the battery packs, you will see a screen that looks something like this. 

Battery Information         
                                                         
Resource name . . . . . . . . . . . :  DC01              
Serial number . . . . . . . . . . . :  xx-xxxxxxx        
Type-model  . . . . . . . . . . . . :  2757-001          
Frame ID  . . . . . . . . . . . . . :  1              
Card position . . . . . . . . . . . :  C01               
Battery type  . . . . . . . . . . . :  Lithium Ion (LiIon)
Battery state . . . . . . . . . . . :  Warning condition 
Power-on time (days)  . . . . . . . :    806             
Adjusted power-on time (days) . . . :    945             
Estimated time to warning (days)  . :      182            
Estimated time to error (days)  . . :     273

Note :- Both the message warning value and the time to error value are marked as estimates. This means that these numbers are not exact predictive values; battery failure could be much closer than you think and you should get IBM in as soon as possible to help survey the situation and schedule a cache battery pack change.      


Wednesday, July 10, 2013

Creating a virtual printer session and device - PDF printer

AS/400 virtual printing allows users to print to their Windows 95 default printer over the network if an AS/400 printer is not available.  This is accomplished by setting up an AS/400 printer session that will act as an AS/400 printer. Virtual printer session is also very helpful and handy in getting PDF output of spool files, if you have PDF editor installed. Follow the steps listed below to set up an AS/400 virtual printer session.

CREATE A DESKTOP AS400 ICON

1. Right click and then create a new AS 400 desktop Icon.


2. Select Application PC 5250 Emulator


3. Click next and then it will automatically pick up IP address or you can modify it. System name or IP address can be specified.


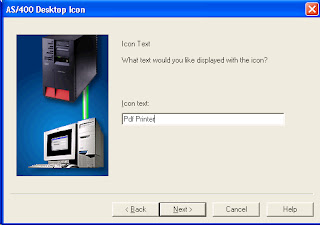
4. Click next and specify Icon Test , this can be anything you want. Here I have PDF Printer.


5. Click Next and click on FINISH.

6. After this you can view the Icon in your desktop as below,

7. Then click on the desktop Icon which we have created and then click on Printer in 
Type of Emulation.

8- Specify workstation ID as anything as per your choice, I have taken TEST.

9. This will open up a small window which will ask for your credentials in AS400.

10. After you provide the user id and password this will open up the printer session that will look like below,


You have created an AS/400 virtual printer.  Double-click the icon to open the AS/400 virtual printer session.

Printing

Double-click the AS400 Virtual Printer icon on the Windows 95 desktop.
If it did not automatically start, click the Start button under Status.
On the AS/400 session, click File\Printer Setup.  Click the printer you normally print to and click the OK button.  You should only have to perform this step once.
Enter 2 for the spool file you wish to print.  On the command line, type outq(Workstation ID) save(*yes) prtqlty(*draft).  If you do not wish to save the file, do not enter save(*yes).
If a message box from your virtual printer session appears with a  message that you do not have a default printer set up, click OK to continue and perform step two afterwards.  


Tuesday, July 2, 2013

Image catalog in AS400

What is an .iso file?

An ISO is an archive file of an optical disc. This is basically a type of disk image composed of data written in every sector of the optical disc. If you have noticed in any software installation CD, when you open it it would have several files in it. When you create an ISO image of the CD that would contain all these files in one file that has .iso extension. While creating an Image catalog it is required to transfer all the content of the installation CD to AS400, if you are going to do it via image catalog.

How to create .iso file?

You are required to have ISO converter loaded on the PC or laptop. There are many free ISO converter available for free. You just have to load the CD to CD drive and then use your software to make an ISO file of it.

FTP this ISO file to your AS400 system :-

This can be done by using FTP from your PC or laptop to AS400 system. First go to the location where you have stored your ISO image. FTP the system which you want to transfer the file. You would be required to provide credential and then put the file in the directory.
1-      FTP  <IP address/System name>
2-      Login Id
3-      Password
4-      Bin
5-      PUT library name/filename.savf   filename.savf
6-      Quit
Below is a screen print of the same.


After it has transferred you will see the below messages.


You can verify if this ISO file has loaded to the drive by  iSeries Navigator.
Go to File system>ROOT>Showcase (here Showcase is the directory where I have stored the ISO file).


What is Image Catalog?

This is a image file that enables user to apply fix and software to AS400 without using the physical media and thereby save time and effort. This enables admin to apply patch from remote location.

Create a virtual device, this is required as it would be similar as loading the CD to a drive.
Use below command

CRTDEVOPT DEVD(OPTVRT01) RSRCNAME(*VRT)

This will create a new virtual device named OPTVRT01. You will get below message when it is created.

 Description for device OPTVRT01 created.  

Now, make the virtual device active.

 wrkcfgsts *dev optvrt01

Take option 1 to vary on the device. When you refresh the device should be in ACTIVE status.

Now create image catalog in the directory where you want to store the image catalog. I am using showcase directory.


CRTIMGCLG IMGCLG(SHOWCASE) DIR('/showcase') CRTDIR(*NO)


Once this image catalog has been created, you will receive the below message.

Image catalog SHOWCASE created in library QUSRSYS.

Now, add this image catalog to the optical device.


ADDIMGCLGE IMGCLG(SHOWCASE) FROMFILE(sc_9.1.iso) TOFILE(*fromfile)


You will receive the message

Image catalog entry added to image catalog SHOWCASE.

Now, load this image catalog to the optical device.

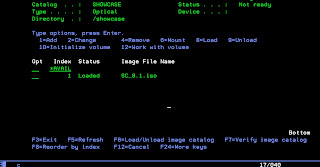
Now, you can verify if this is loaded on to the optical device by,


WRKIMGCLGE IMGCLG(SHOWCASE)    


If it is in NOT READY status,
 Then

WRKIMGCLG *ALL


take option 8 to LOAD next to the Image catalog and provide the Optical device name.


Next it should be in ready status.

Image                               ASP                 Device
Catalog     Status      Type     Threshold  Device      Status
                                                               

SHOWCASE    Ready       Optical    *CALC    OPTVRT01    Active  


Now to verify if it is mounted correctly.

WRKIMGCLG

Take option 10 Verify Image Catalog

And take *OTHER in Verify type parameter.


You will receive message as

Image catalog SHOWCASE, type *OTHER verified.

Now this is ready to apply the patch. You just have to use LODRUN command.


Deleting all the save files and cover letters of PTF from AS400 system

Why is it required to delete the save files and cover letters of PTF's?

Many a times, administrator assume that these would be needed at a future date, so they leave these save files that are created at the time of patch upgrade to sit on system. Gradually, this takes up a huge amount of space on your system. In order to free this place it is  required to delete them. The safe way would be to take a backup of it so that you can restore it back when needed.

*note :- Deleting PTF would not remove the PTF's that are applied on to the system, instead it will just delete the save files and cover letters associated with PTF from the system.

You can check the number of PTF save files by checking the Q* files that sit in your QGPL.

WRKF FILE(QGPL/Q*) FILEATR(SAVF)


You can directly delete these files by taking OPTION 4 to delete. However, this would leave behind the cover letters in the system.

In order to delete the entire list of PTF's use the following

                      Delete Program Temporary Fix (DLTPTF)           
                                                                      
 Type choices, press Enter.                                           
                                                                      
 PTF  . . . . . . . . . . . . . .   *all          Character value, *ALL
                + for more values                                     
 Product  . . . . . . . . . . . .   *ALL          F4 for list         
 Release  . . . . . . . . . . . .   *ALL          *ALL, VxRxMx        
 Delete duplicate PTF numbers . .   *NO           *YES, *NO           


Monday, July 1, 2013

Create a Subsystem

To creat Subsystem:


  1. CRTSBSD(creat subsystem description).
  2. Enter the Subsystem name and Library(by default the subsystem will be created in QGPL library).

         Enter the Pool Identifier( Each subsystem can be given maximum of 10 pools)

         Storage Size (By default it is *BASE, it is specified in Kilobytes).

    3. CRTJOBQ ( Creat job queue)

    4. Note: we can creat ‘N’ no of jobq and then attach to a Subsystem.
                      5. CRTOUTQ (Creat outq).

    6. ADDJOBQE( Add jobq entries)


    Note: We had created subsystem, jobq and outq separately, now we have combined these three objects.

    Maximum no of active jobs is 1 by default (But for QCTL subsystem there can have N no of active jobs at a given instant of time).

    Sequence no( it is priority given to Jobq. say there are 3 jobq assigned to a subsystem with sequence no 10,20 and 30, All  the jobs under the jobq with sequence 10 is submitted first and then the jobs in jobq 20 and then jobs of jobq 30.)


Related Posts Plugin for WordPress, Blogger...